Home
Meet the Pirate
Contact Me
Meet the Pirate
Media
Privacy Policy, Disclosure & Terms and Conditions
Clever Pink Pirate
Clever crafts, recipes, and family travel on a budget!
Recipes
Desserts
From Scratch
DIY
Party Ideas
Kid Crafts
Thrifty Decor
Spray Paint
Travel
US Travel
Visit California
Camping
Arizona
Phoenix Pogo Pass with Pogo Pass Discount Code
Disney
Blogging 101
SEO Tips
Viewing posts tagged with: Mad Science Birthday
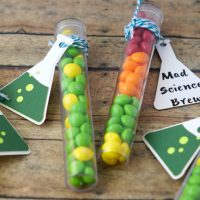
Mad Science Candy Test Tubes
Mad Science Cookies
Mad Science Party Items on Amazon.com
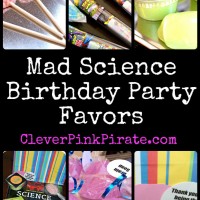
Mad Science Birthday Party: The Goodie Bags
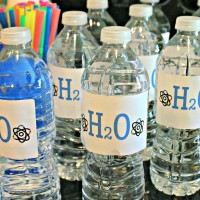
Mad Science Birthday Party: The Decor & Food
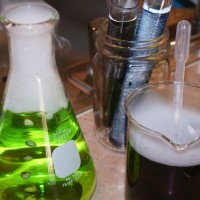
Mad Science Birthday Party: The Experiments and Activities
Mad Science Birthday Party: The Party!