Home
Meet the Pirate
Contact Me
Meet the Pirate
Media
Privacy Policy, Disclosure & Terms and Conditions
Clever Pink Pirate
Clever crafts, recipes, and family travel on a budget!
Recipes
Desserts
From Scratch
DIY
Party Ideas
Kid Crafts
Thrifty Decor
Spray Paint
Travel
US Travel
Visit California
Camping
Arizona
Phoenix Pogo Pass with Pogo Pass Discount Code
Disney
Blogging 101
SEO Tips
Viewing posts tagged with: Holiday
DIY Christmas Shadow Boxes
Vintage & Rustic Hot Cocoa Bar
Disney Halloween Inspired Cupcake Toppers
St. Patrick’s Day Lucky Charms Snack Mix Recipe
Orange Cranberry Ginger Sangria
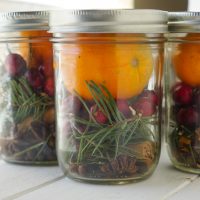
DIY Christmas Potpourri Mason Jar Gift
Holiday Truffle with Sprinkles Recipe
Candy Cane Peppermint Fudge Recipe
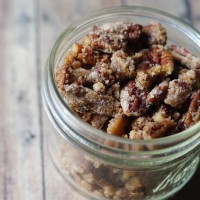
70+ Mason Jar Gifts To Give All Year Round
Tips for Hosting the Ultimate Holiday Cookie Exchange
Easy & Inexpensive Rustic Christmas Gift Wrapping Ideas
Easy to Make Candy Apple Pops Recipe
Halloween No Bake Pies
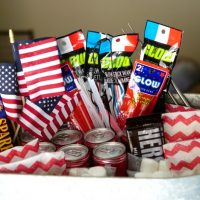
July 4th Party Kit with Printables!
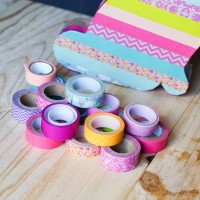
Washi Tape Easter Bunny
Easy Eggnog Trifle Recipe
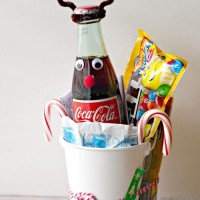
Easy DIY Christmas Gift ~ A Movie Night In
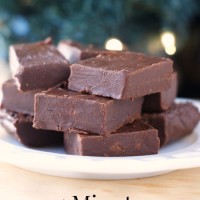
5 Minute Nutella Fudge Recipe
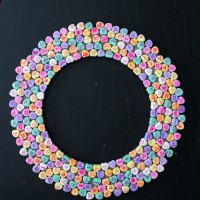
Valentine’s Candy Heart Wreath
Pfeffernusse Cookie Recipe
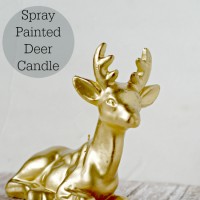
Spray Painted Deer Candle
20+ DIY Wood Slice Crafts
Easy Tiger Butter Candy Recipe
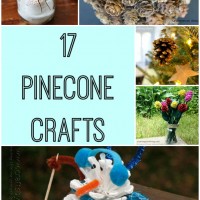
17 Pinecone Craft Tutorials
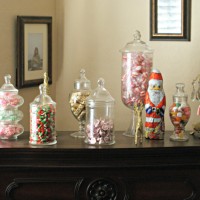
Christmas Candy Mantle
DIY Easy Christmas Ornament Earrings
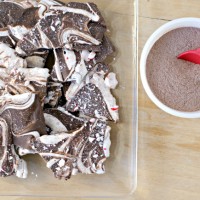
Hot Chocolate Bark Recipe
Upcycle Food Containers into Gift Boxes
Knotts Berry Farm Merry Farm
DIY Baker’s Gift Basket
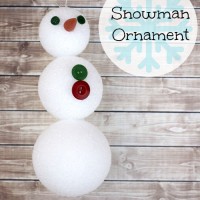
Easy Snowman Ornament Craft for Kids
Christmas Vignette Crafts
1
2
3
Next Page »